Git explained with Oh My Zsh aliases
Dec 1, 2024
Storytime!
Git is the version control system loved by many software developers because of its ability to save snapshots of the codebase over time. This allows one to go back to any point in time to review a change, undo a change, iterate on a new idea from any other version, help debug when and where a bug was introduced, and more.
When I first started using the terminal in college, I also installed Oh My Zsh because I heard that is what all the cool engineers used. At the same time, I started learning the basics of git when I had to collaborate with others on our various hackathon projects. I picked up the basics of adding, committing, pushing, and pulling changes; however, our git practices were not good as everyone on our team just made their changes on the main branch and tried to avoid merge conflicts by not modifying the same file.
Since I wanted to be a cool engineer, I started reading the Oh My Zsh git plugin README file to understand the various popular git commands that others used. Soon, I started memorizing and practicing using the various aliases. In turn, I think that understanding how other people used git helped me improve. In the rest of this blog post, I will share the Oh My Zsh git aliases that I use every day (along with the corresponding full git commands) to help you get started using git.
Installation
By following these instructions, git can be installed on macOS, Windows, or Linux; however, Oh My Zsh can only be installed on macOS or Linux. If you are using Windows, I recommend that you install the Windows Subsystem for Linux (WSL). This will allow you to have a functioning Linux environment where you can run any Linux command on your Windows machine without the need to dual boot your system.
Once you have your Unix-like environment setup, you can install Oh My Zsh with this command taken from their README:
sh -c "$(curl -fsSL https://raw.githubusercontent.com/ohmyzsh/ohmyzsh/master/tools/install.sh)"Configuration
Each git commit is associated with a user name and email address. Run these commands to set your git user name and email address respectively. Also, use the same email address as the one you are using on GitHub (or any other remote host) so that your changes can be linked to your profile.
g config --global user.name "My Name"  # git config --global user.name "My Name"
g config --global user.email my.name@domain.com  # git config --global user.email my.name@domain.com
You may also want to configure your editor of choice. Git uses this editor if you need to write a commit message (e.g., after resolving a merge conflict).
g config --global core.editor vim # git config --global core.editor vimSetup a repository
Create a repository
To start a new git project, create a new folder and run this command from within the folder:
g init # git initClone a repository
To contribute to an existing git repository, create a copy of a remote repository by running:
g clone git@github.com:nyoungstudios/ascii-minesweeper.git # git clone git@github.com:nyoungstudios/ascii-minesweeper.gitThis URL (prefixed by git instead of https) uses SSH to authenticate you with the remote repository (GitHub in this case)
Branches
Create a branch
The default branch name of a repository is typically main or master. When working on a feature or bug fix, it is best practice to create a separate branch for your new changes so that you can make any number of iterations and test your changes independently. Then, you can create a pull request to merge it into the default branch. To create a new branch, we can use the switch command. This creates a new branch based off the current branch we were on.
gsw -c new-branch # git switch -c new-branchWhile the checkout command can be used to create or switch between branches, I do not use it for these purposes since the checkout command also has other purposes that I have trained my brain to use it for.
Switch between branches
To switch to a branch that already exists, omit the -c option.
gsw existing-branch # git switch existing-branchTo switch to the main branch, you can use this special alias.
gswm # git switch mainWhile not a Oh My Zsh specific shortcut, you can pass a dash to switch to the previously visited branch like cd - for changing to the previously visited directory.
gsw - # git switch -General git workflow
There are four places where your changes can exist. The local file system, the staging area, the local repository, and the remote repository. The following commands in this section move your changes along in this order.
Make changes
First, add the files that you have made changes to. You can also pass multiple paths (both folder and file paths) - this also holds true for most other git commands. This groups our changes together in the staging area.
ga path/to/file.txt # git add path/to/file.txtOr add all files.
gaa # git add --allThen, write a commit message for the files you have staged. This marks the changes as the latest version on your local branch.
gcmsg "my commit message" # git commit --message "my commit message"Push your changes
Push your changes from your local repository to the remote repository. Other users can see your changes after you run this command.
ggpush # git push origin branch-nameFetch new changes
Check if there are any new changes in the remote repository.
gfo # git fetch originPull new changes
This pulls new changes from the remote branch to your local copy.
ggpull # git pull origin branch-nameMerge changes
Default merge
A merge combines the history of two branches.
gm branch-name # git merge branch-nameMerge with rebase
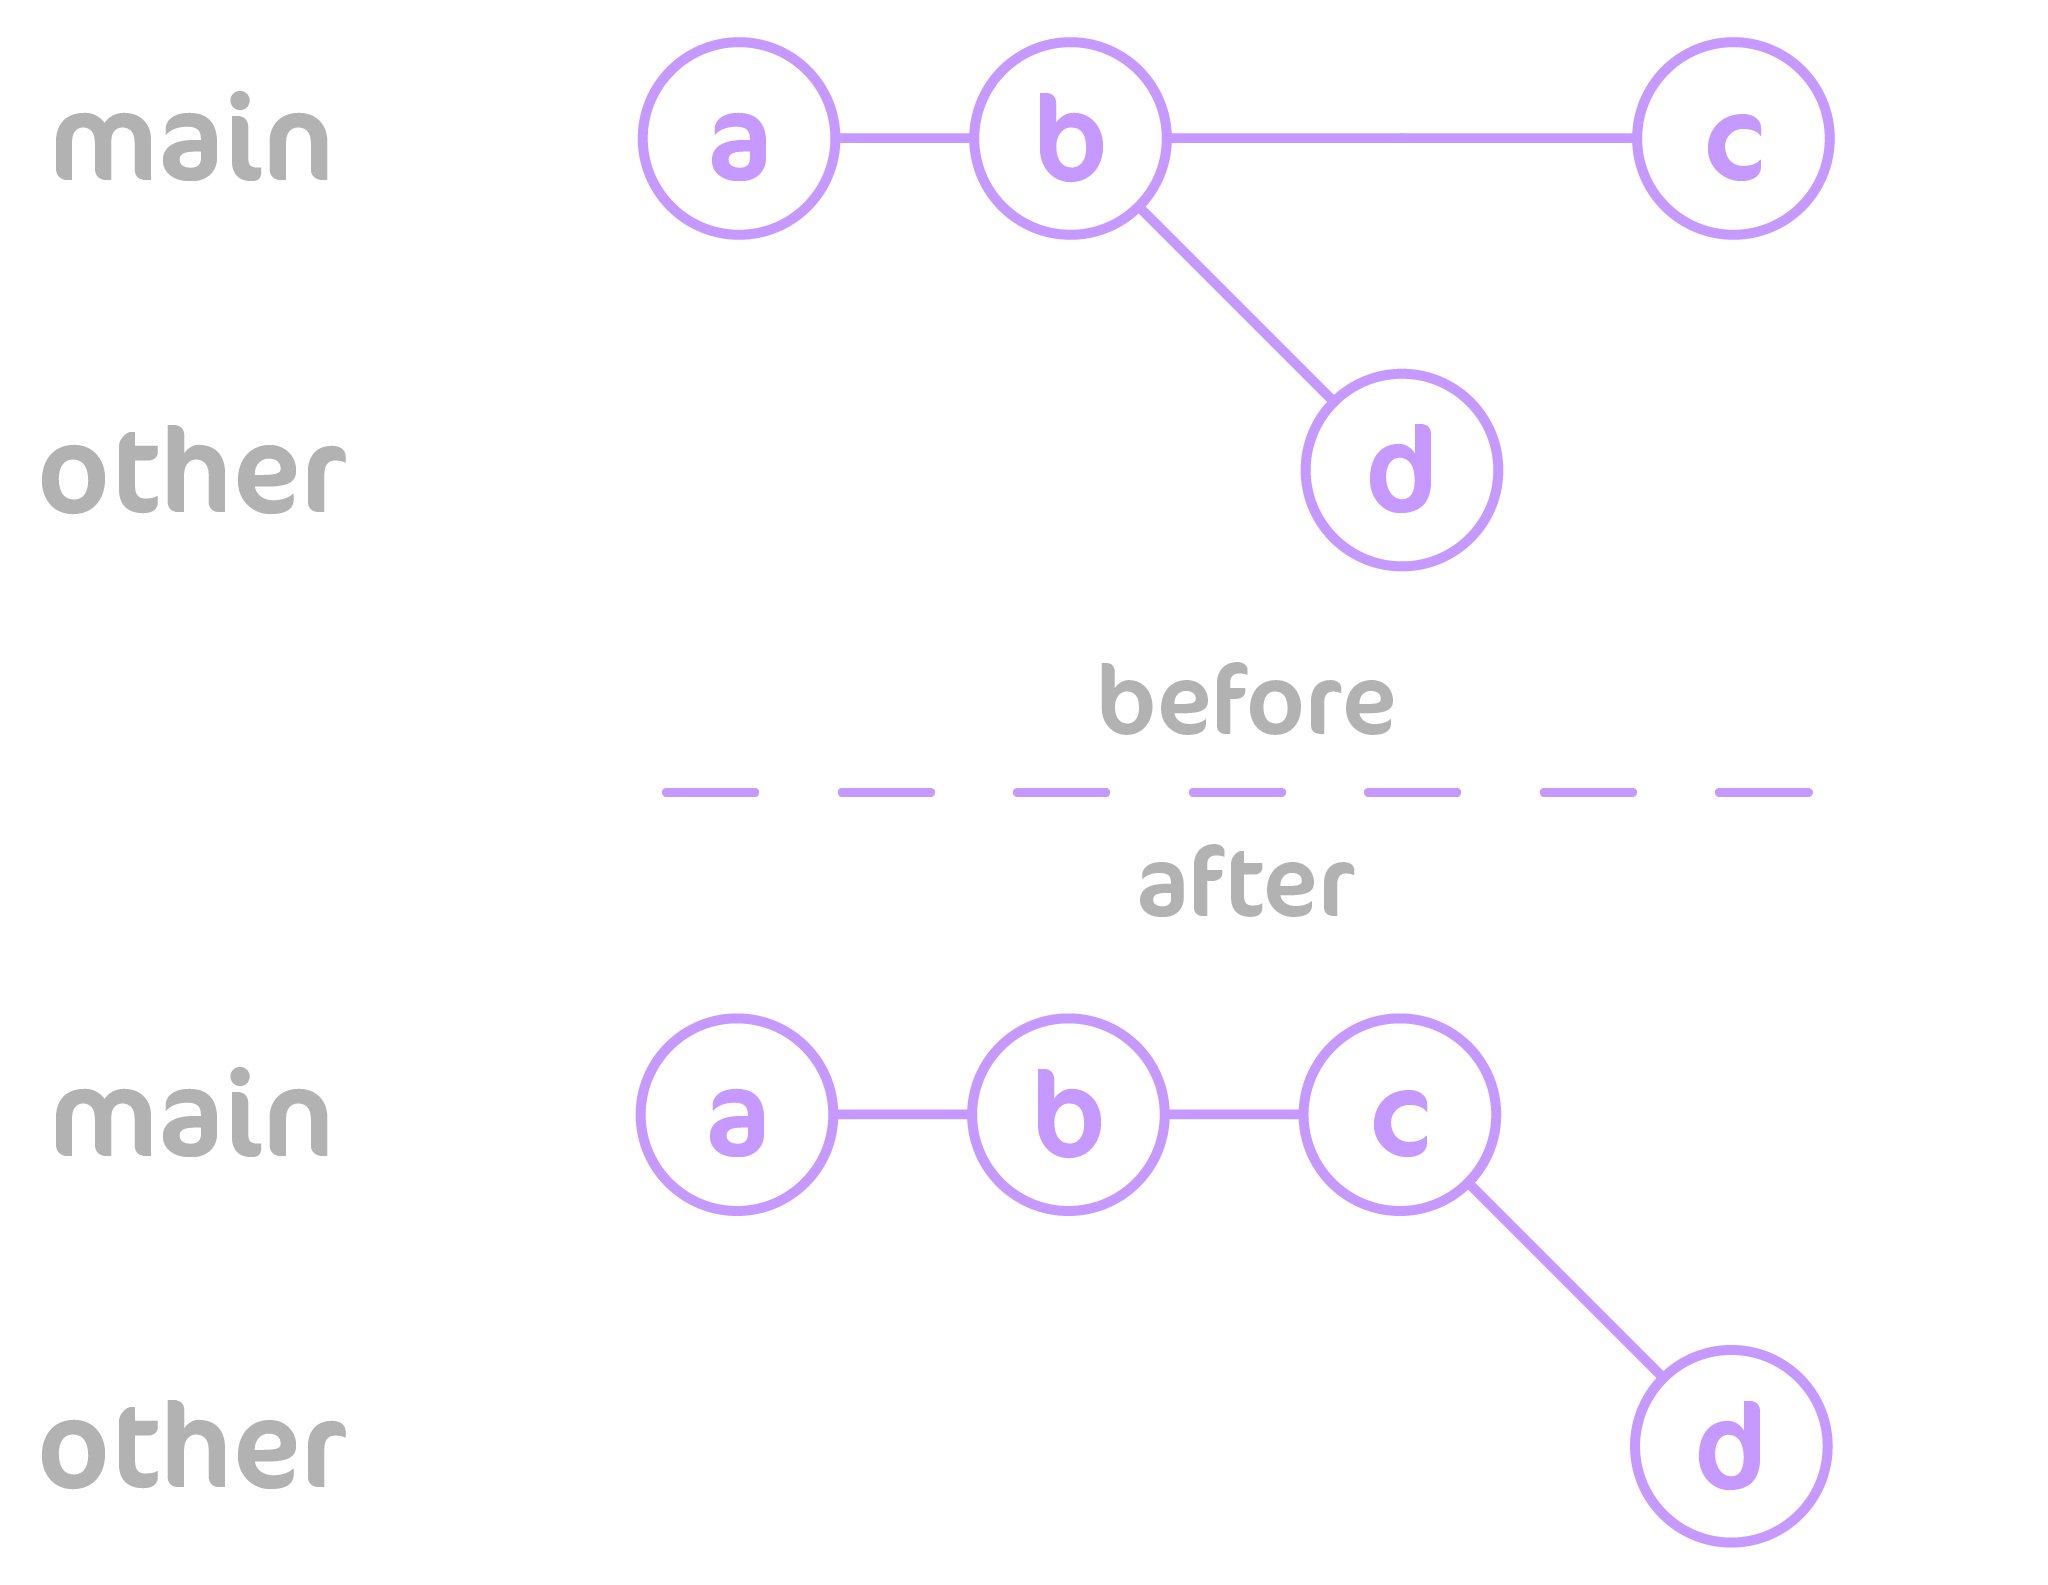
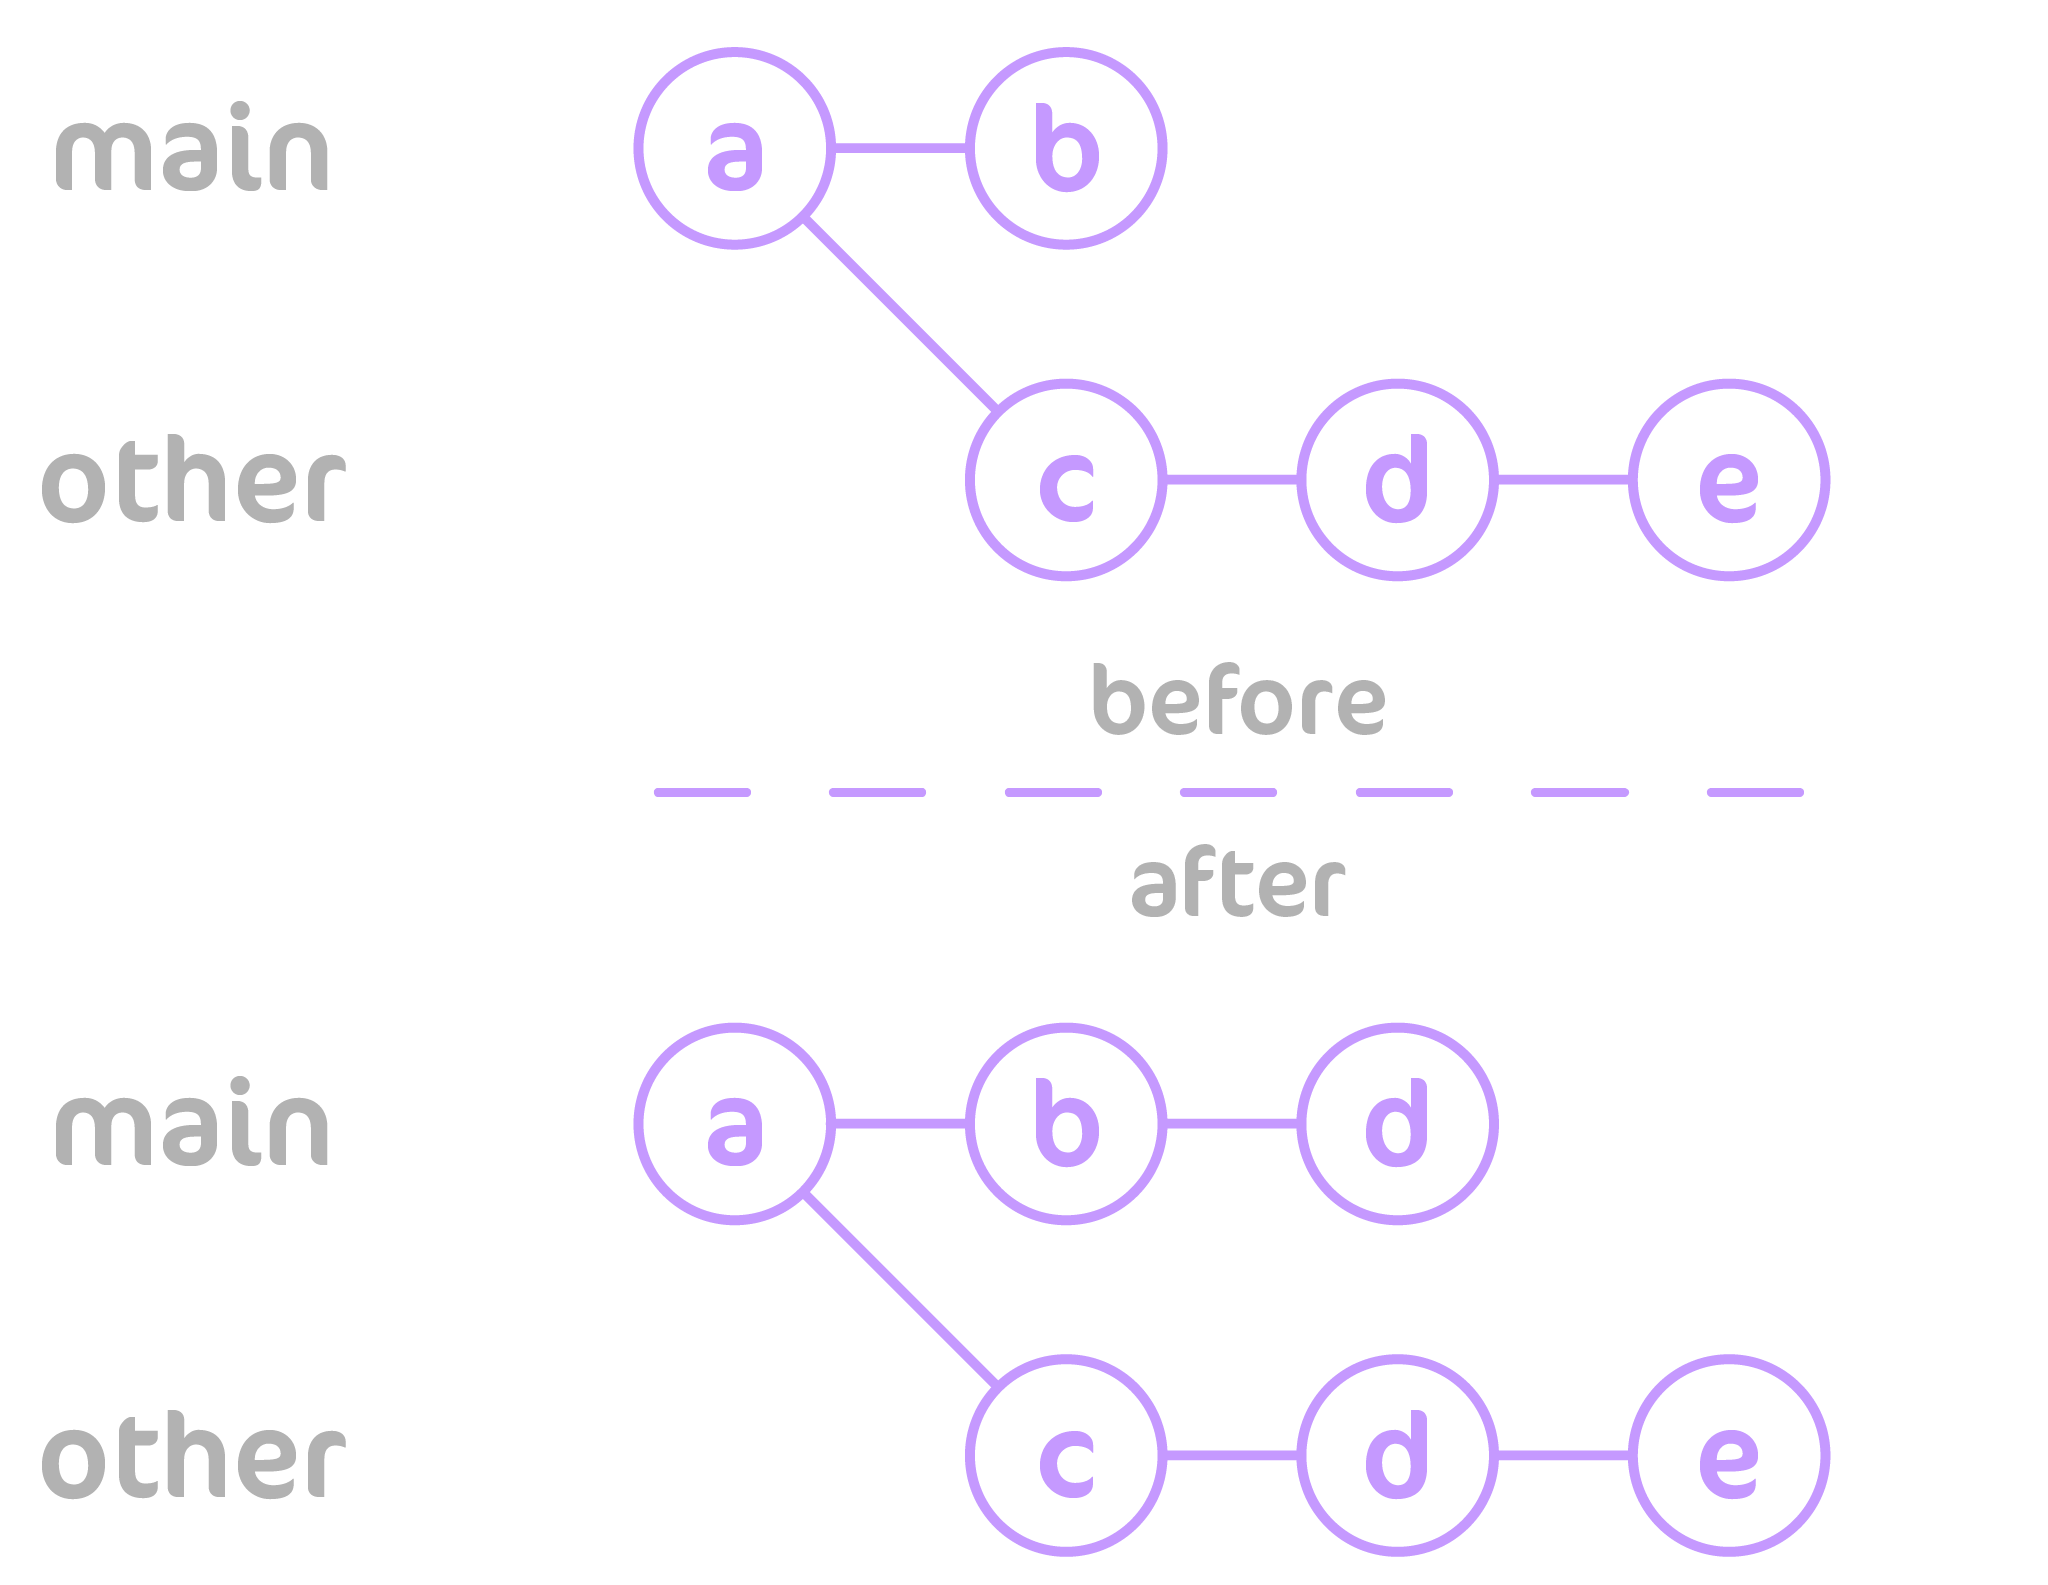
A rebase reorders the commits on your current branch so that the new commits on your branch are placed on top of the rebased branch.
grb branch-name # git rebase branch-nameYou will have to use a force push to rewrite the history in the remote repository after using rebase.
ggpush -f # git push origin branch-name -fCopy changes
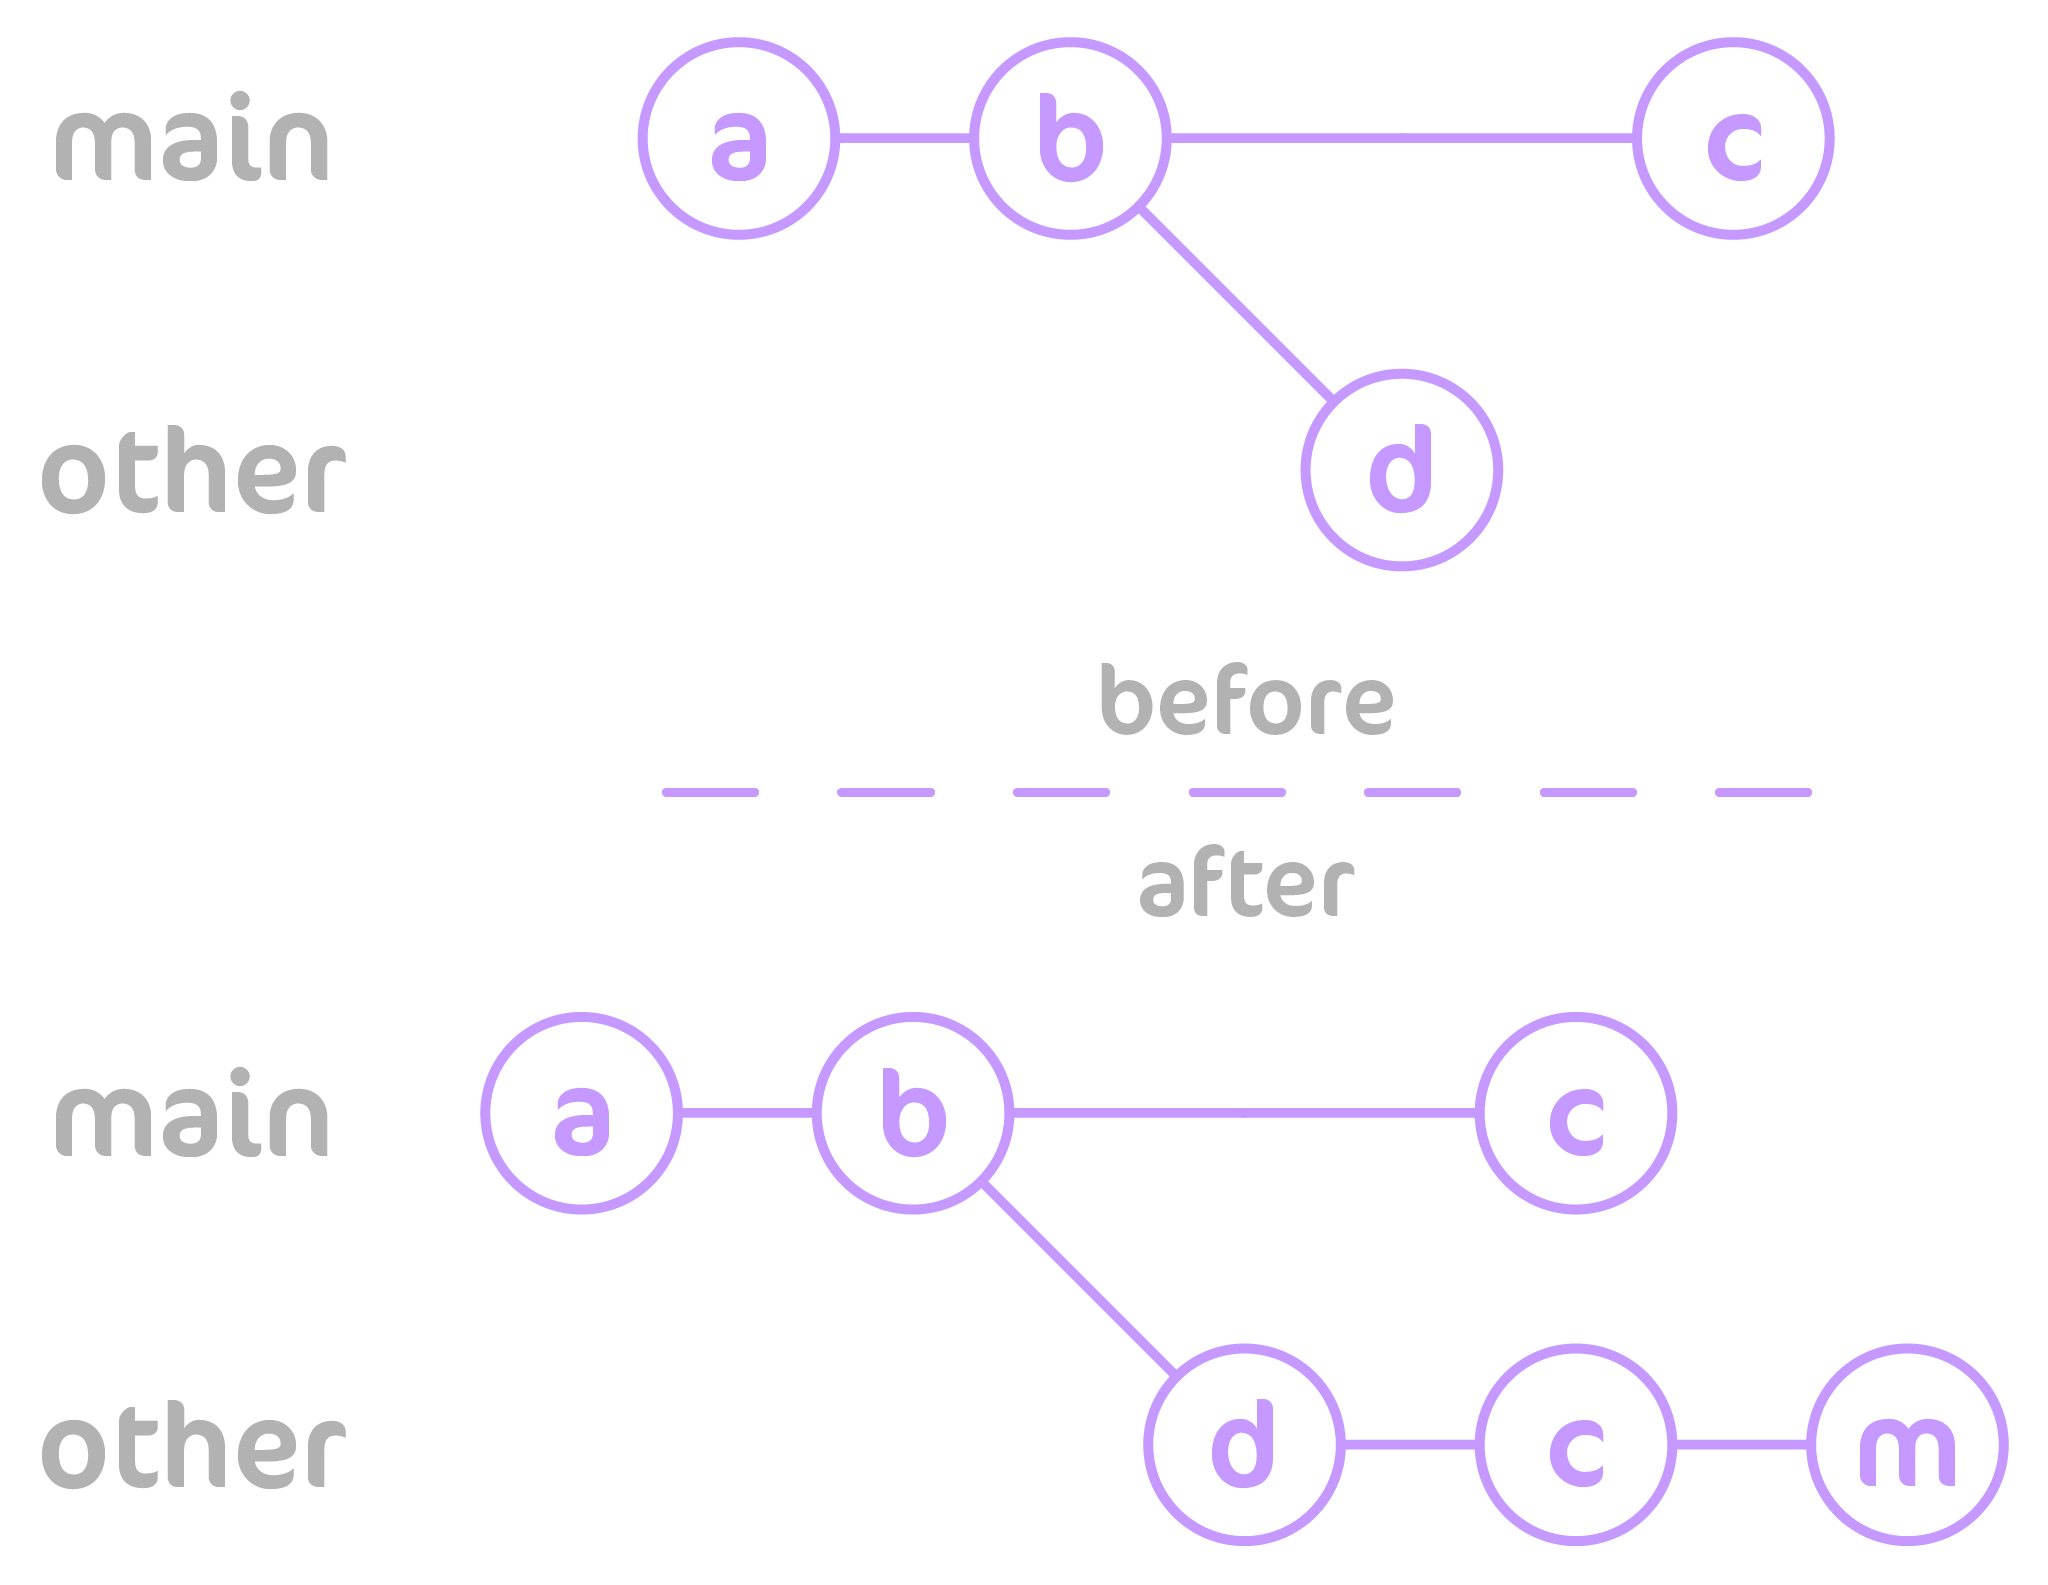
Cherry pick
A cherry-pick applies a commit on top of your current branch.
gcp abc1234 # git cherry-pick abc1234Restore from source
Use the restore command if you want to copy changes in a file from another version to your current branch. Opposed to the cherry-pick command, the restore command is a good option to use if the changes you want to copy are not contained in a single commit or if the history of the two branches greatly differs. You will still need to add and commit the changes afterwards.
grss other-branch-name -- path/to/file.txt # git restore --source other-branch-name -- path/to/file.txtUndo changes
Restore
If you have made changes to a file that is tracked by git, you can undo it by running:
grs path/to/file.txt # git restore path/to/file.txtOut of habit, I have always used the checkout command instead of the restore command to do this operation.
gco path/to/file.txt # git checkout path/to/file.txtReset
If you have made changes to a file and have staged the changes, you can unstage it by running:
grh path/to/file.txt # git reset path/to/file.txtIf you want to reset your changes on your branch to another version, you can do a hard reset.
# hard reset to the remote version of another branch
grhh origin/other-branch-name  # git reset --hard origin/other-branch-name
# or hard reset to a specific hash
grhh abc1234  # git reset --hard abc1234
Personally, I do not use the grh family of aliases since rh does not sound like reset. Instead, I type out g reset. In case you are wondering, grt is an alias that already exists, and it is a helpful shortcut function to change directories to the root directory of the git repository.
Utility commands
Check the status
This command checks the status of the repository and prints out which files are tracked/untracked, have changed, or are staged.
gst # git statusCheck the difference
This command can be used to check the difference between two versions.
# by default, compares the unstaged changes vs current local repository HEAD
gd  # git diff
# or pass two versions and a file/folder path
gd abc1234 abc5678 -- path/to/folder  # git diff abc1234 abc5678 -- path/to/folder
Print out the history
The log command prints out the git history on your current branch.
glg # git log --statSometimes it is useful to only see one commit per line especially if you want to pipe the output to grep or another command line tool.
glo # git log --oneline --decorateWork with temporary changes
Sometimes you find yourself in the middle of working on a change, but you need to change branches to do something else. You can save your changes without having to make a commit by using git stash.
gsta -m "message" # git stash push -m "message"Items are saved in the stash by using a stack data structure (LIFO). This means that the latest changes tracked by git stash are at the top of the stack with index number 0. You can use pop to remove the change from the top of the stack and apply the changes to your current branch.
gstp # git stash popIf you want to apply a change that is not the last item added to the stash, you can use the apply command with an index number.
gstaa 1 # git stash apply 1It is a good idea to clean up your stash so that you do not have too many temporary changes. This command deletes a stashed change at a specified index.
gstd 0 # git stash drop 0This command prints out what is in your stash.
gstl # git stash listFinally
While my initial goal for installing Oh My Zsh was to fit in with all the other cool engineers, I found that the git plugin helped me learn some best practices in addition to saving me some extra keystrokes. I hope that my explanation of these commands can help you on your git learning journey too. Lastly, my advice would be to continue using git on all your various projects (whether at work, school, or play). Along the way, you will encounter new situations that might be unfamiliar. You should take these new situations as a learning opportunity for new ways that you can use git, and this will continue to deepen your overall understanding.